Creating a Google Tag Manager (GTM) account is an essential step for anyone looking to streamline the management and deployment of marketing tags on their website. Whether you’re a digital marketer, a business owner, or a web developer, GTM can save you time and enhance your tracking capabilities. In this guide, we will walk you through the process of setting up your GTM account from scratch.
What is Google Tag Manager?
Google Tag Manager is a free tool that allows you to manage and deploy marketing tags (snippets of code) on your website or mobile app without having to modify the code directly. This tool helps you efficiently track and analyze user behavior, which can be used to improve your marketing strategies and website performance.
Why Use Google Tag Manager?
- Simplifies Tag Management: Easily add and update tags without needing a developer.
- Increases Website Speed: Tags are loaded asynchronously, which means they don’t slow down your website.
- Improves Data Accuracy: Reduces the chances of errors when implementing tags.
- Enhances Flexibility: Supports a wide range of tag types, including Google Analytics, AdWords, and third-party tags.
Step-by-Step Guide to Creating a Google Tag Manager Account
Step 1: Sign Up for Google Tag Manager
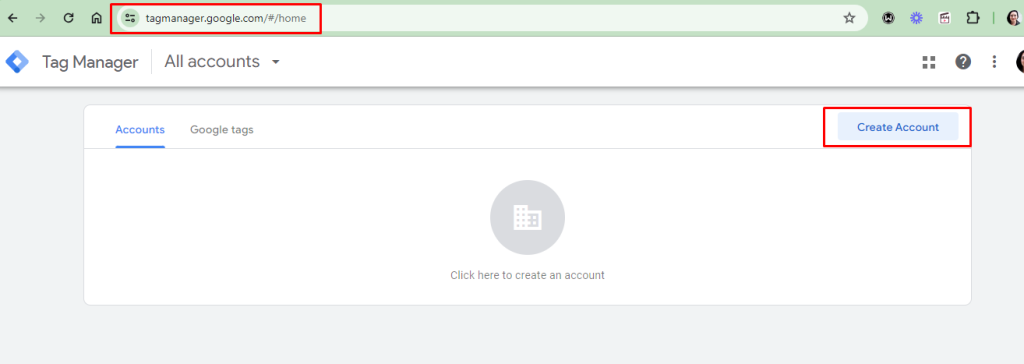
- Go to the Google Tag Manager Website: Visit tagmanager.google.com and click on the “Start for free” button.
- Sign In with Your Google Account: If you don’t have a Google account, you will need to create one.

Step 2: Create Your Account and Container
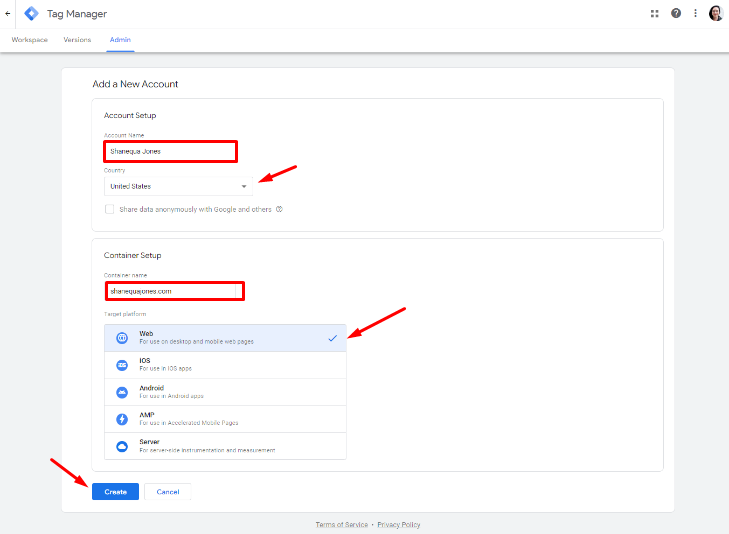
- Account Setup: Enter your account name (usually your company name) and select your country.
- Container Setup: Enter your container name (typically the name of your website or app). Select the target platform (Web, iOS, Android, AMP).

Step 3 : Your New GTM Account is Ready!
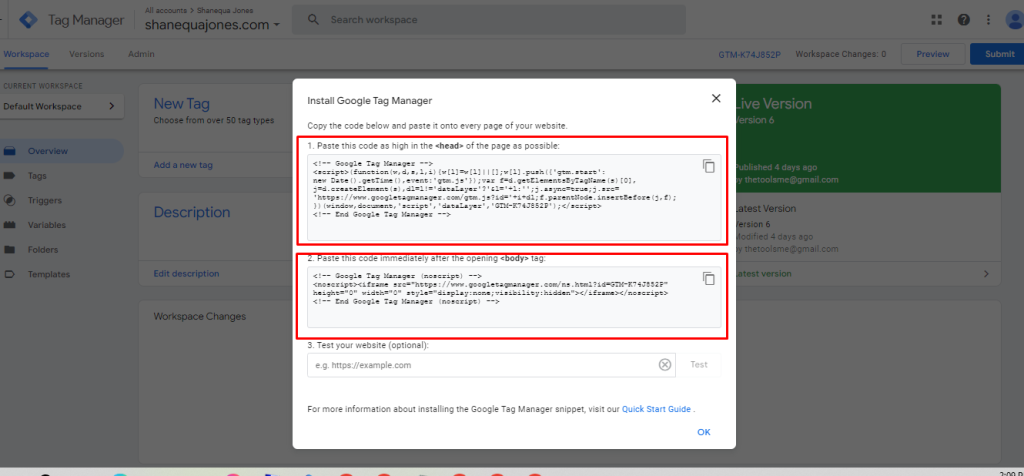
Congrats! You have just created your brand new Google Tag Manager account. You can see your GTM Container ID and the container snippet code highligthed in the image below.

Graphic design is all about making visuals that stand out,...
Client: DogRoomIndustry: Pet ServiceWebsite: www.dogroom.co.nz Project Overview: DogRoom.co.nz, a leading...
Client: Shanequa Jones Real EstateIndustry: Real Estate – Buying and...
Understanding how Google Tag Manager (GTM) operates is essential for...


